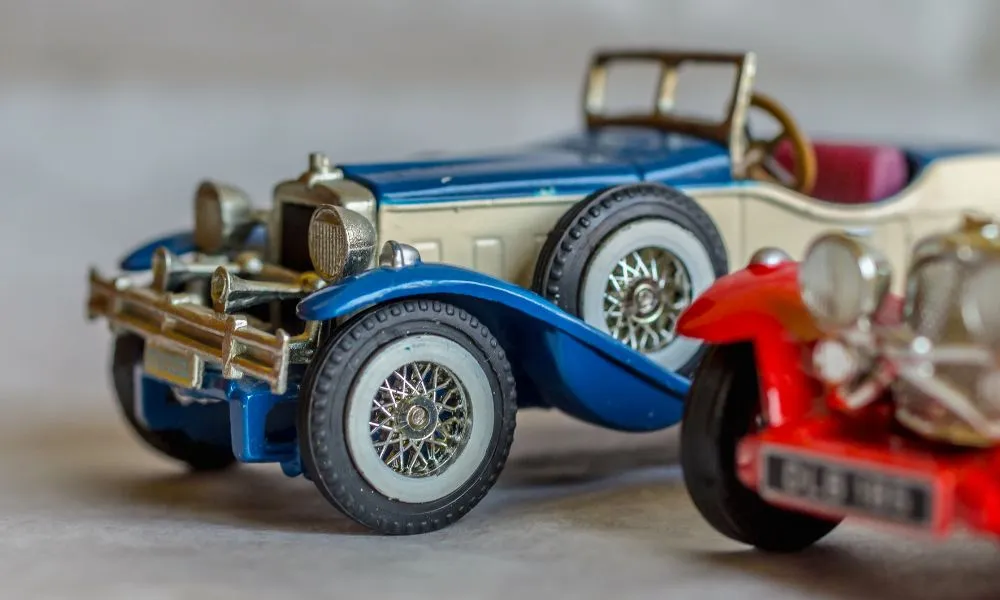
Diecast car painting is a rewarding hobby that allows you to transform ordinary miniature vehicles into stunning, personalized collectibles. Whether you’re a seasoned modeler or a complete beginner, this guide will walk you through the essential steps to achieve professional-looking results. From selecting the right tools and materials to mastering painting techniques and avoiding common pitfalls, you’ll gain the knowledge and confidence to embark on your diecast car painting journey. Prepare to unleash your creativity and bring your miniature car visions to life.
Essential Tools and Materials
Before you begin, gather the necessary tools and materials. This will ensure a smooth and enjoyable painting process. You’ll need a well-ventilated workspace, safety glasses and a respirator to protect yourself from fumes. Also, a selection of small brushes, airbrush (optional but recommended for base coats), fine-grit sandpaper, primer, various paint colors (acrylic, enamel, or lacquer), clear coat, and detailing supplies like masking tape and toothpicks will be needed. A good quality work light is also essential to illuminate your project and reveal any imperfections. Furthermore, a diecast car of your choice, preferably one in good condition, provides the perfect canvas for your artistic endeavors. Proper preparation is key to a successful paint job, so don’t skimp on quality materials.
Choosing the Right Paints
The type of paint you choose significantly impacts the final outcome of your diecast car painting project. Acrylic, enamel, and lacquer paints are the most common options, each with its own advantages and disadvantages. Consider factors such as drying time, durability, and ease of use when making your selection. Experiment with different types to find what works best for you. Always ensure that the paints are compatible with the primer you use. Proper paint selection is critical for a smooth finish and long-lasting results. Remember to always read the manufacturer’s instructions for proper application and safety precautions.
Acrylic Paints

Acrylic paints are water-based, making them easy to clean up with water. They dry quickly, which is advantageous for beginners. They also have a low odor, making them suitable for indoor use with adequate ventilation. Acrylics offer good color vibrancy and are available in various finishes, from matte to gloss. However, they may not be as durable as enamel or lacquer paints, and multiple coats might be necessary to achieve a consistent finish. Thinning acrylic paints with a dedicated thinner is crucial for airbrushing. Consider using a primer specifically designed for acrylic paints to improve adhesion. Acrylics are an excellent choice for detail work due to their fine pigment and ease of handling.
Enamel Paints
Enamel paints are oil-based and known for their durability and glossy finish. They offer excellent resistance to scratches and wear, making them ideal for models that will be handled frequently. Enamels have a longer drying time compared to acrylics, which can be an advantage for making corrections and achieving a smooth finish. However, they produce strong fumes and require mineral spirits or enamel thinner for cleanup. Proper ventilation is essential when working with enamels. Enamel paints offer a wide range of colors and finishes. While more durable, they can take longer to cure fully. Enamel paints provide a classic, resilient finish for diecast car models.
Lacquer Paints
Lacquer paints are solvent-based and dry very quickly, offering a smooth and durable finish. They are highly resistant to scratches and provide excellent color depth. Lacquers are known for their exceptional gloss and are preferred by many modelers for a professional look. However, lacquers produce strong fumes and require specialized thinners for cleanup, making them less beginner-friendly. Proper safety precautions, including a respirator, are absolutely necessary. Due to their quick drying time, lacquers require careful application to avoid runs or imperfections. Practice is essential when using lacquer paints, but the results can be stunning.
Preparing Your Diecast Car

Proper preparation is the foundation of a flawless paint job. This involves disassembling the diecast car, cleaning the parts, removing the old paint, and sanding the surface. This stage is crucial for ensuring that the new paint adheres properly and results in a smooth, professional finish. The effort you put into this stage will significantly impact the final result. Take your time and pay attention to detail, as this will prevent imperfections and ensure a quality outcome. Failing to prepare your model properly can lead to paint chipping, bubbling, and a less appealing appearance. Remember, patience and thoroughness are your best allies during this process.
Disassembly and Cleaning
Before you start painting, carefully disassemble the diecast car. Remove all detachable parts like wheels, windows, mirrors, and any other components. This makes it easier to paint each part evenly and avoid unwanted paint on areas. Use appropriate tools and be gentle to avoid damaging the model. After disassembly, thoroughly clean all the parts with warm, soapy water to remove any dust, grease, or fingerprints. Rinse the parts well and allow them to dry completely. A clean surface ensures better paint adhesion and a professional finish. Avoid using harsh chemicals that might damage the plastic or metal components. Pay special attention to tight corners and crevices to remove any lingering dirt.
Stripping Old Paint
Removing the old paint is essential to provide a clean surface for the new paint. There are several methods for stripping old paint, including chemical strippers, abrasive methods, and oven cleaning. Chemical strippers are effective, but they require careful handling and ventilation. Follow the manufacturer’s instructions and wear protective gear. Abrasive methods involve using sandpaper to remove the paint, but be careful not to remove too much material or damage the details. Consider using a fine-grit sandpaper to prevent scratching. Oven cleaning is an option for some diecast models but requires specific temperature control to avoid melting plastic parts. Whichever method you choose, make sure to remove all traces of the old paint for the best results. Always wear appropriate safety gear when dealing with any of these methods.
Sanding and Priming

Once the old paint is removed, lightly sand the surface of the diecast car with fine-grit sandpaper. This will create a smooth surface and improve paint adhesion. Start with a slightly coarser grit and gradually work your way to finer grits to remove imperfections. After sanding, clean the model thoroughly to remove any sanding dust. Then, apply a primer to the surface. Primer creates a uniform base for the paint, improves adhesion, and helps the paint color appear more vibrant. Choose a primer that is compatible with your chosen paint type (acrylic, enamel, or lacquer). Apply thin, even coats of primer, allowing each coat to dry completely before applying the next. The primer is a crucial step, so don’t skip it.
Painting Techniques for Beginners
Painting techniques for diecast cars vary depending on the type of paint and the desired finish. Airbrushing offers the most professional results, providing an even and smooth coat. However, it requires practice and the right equipment. Alternatively, you can use small brushes for detailed work and applying base coats. The key is to apply thin, even coats, allowing each coat to dry completely before applying the next. This prevents runs, drips, and imperfections. Patience and a steady hand are essential for achieving a high-quality paint job. Remember to practice your technique on a scrap piece before painting your model. Take your time, and don’t rush the process to avoid mistakes.
Base Coating
The base coat is the foundation of your paint job, so it’s essential to apply it correctly. If using an airbrush, thin the paint according to the manufacturer’s instructions and apply several thin, even coats. Hold the airbrush at a consistent distance from the model and move it smoothly across the surface. If using a brush, use a high-quality brush and apply the paint with smooth, even strokes. Avoid overloading the brush, as this can lead to drips and runs. Allow each coat to dry completely before applying the next. Multiple thin coats are always better than one thick coat, as they provide a more durable and even finish. Ensure your workspace is clean and dust-free to avoid imperfections in the paint.
Applying Multiple Coats

Applying multiple coats of paint is crucial to achieving a rich, even color and a durable finish. After the base coat has dried completely, lightly sand any imperfections with fine-grit sandpaper. Then, apply additional coats of paint, allowing each coat to dry thoroughly before applying the next. The number of coats you apply will depend on the paint type and the desired effect. For most colors, two to three coats should be sufficient. However, some colors, like yellows and reds, may require more coats to achieve full coverage. Check the paint manufacturer’s recommendations and let each coat cure according to their specifications. Ensure each layer is thin and consistent to get the best result.
Detailing with Precision
Detailing is where you can really make your diecast car unique. After the base coat has dried, use small brushes, toothpicks, or fine-tipped pens to add details such as headlights, taillights, grilles, and other trim. Mask off any areas you don’t want to paint with masking tape. Precision is key in this stage, so take your time and use a steady hand. For fine details, you might consider using a magnifying lamp or a magnifying glass. Different colors can add depth and realism to the model, transforming it. Using a pin wash technique can enhance panel lines and other details. Detailing truly brings the model to life, so don’t skip this step.
Decals and Finishing Touches
Once the paint has dried completely and all the details have been added, it’s time to apply decals and finishing touches. Decals add realism and personalize your model. Clear coating protects your work and gives it a glossy finish. Take your time, and enjoy this final stage of the process. Proper finishing enhances the overall look of the model, ensuring that your hard work pays off. Consider adding weathering effects like washes and dry brushing for an even more realistic look.
Applying Decals

Carefully cut out the decals you want to use. Soak them in water for a few seconds until they loosen from the backing paper. Slide the decal off the backing and position it on the model. Use a soft cloth or cotton swab to remove any air bubbles and excess water. Use decal setting solutions to help the decals conform to curved surfaces. This ensures that the decals adhere properly and look like they are painted on. Once the decals are in place and have dried, you can apply a clear coat to seal them in. Careful application and handling of decals are very important to avoid tearing or wrinkles. Take your time to ensure they are in the right spot before they dry.
Clear Coating and Polishing
Applying a clear coat protects your paint job and gives it a glossy or matte finish, depending on your preference. Use a clear coat compatible with your paint type. Apply several thin, even coats, allowing each coat to dry completely before applying the next. Once the clear coat has dried, you can polish the model to remove any imperfections and enhance the shine. Use polishing compounds and cloths specifically designed for model cars. For a high-gloss finish, polish the model until it shines. This will give your model car a professional look and protect it from scratches. Polishing is the final step, so take your time and make sure that the model looks its best.
Common Mistakes and How to Avoid Them
Several common mistakes can ruin a diecast car painting project. The most common mistakes include not preparing the surface properly, applying paint too thickly, using incompatible paints and primers, and rushing the process. To avoid these mistakes, always take your time to prepare the surface thoroughly. Apply thin, even coats of paint, and allow each coat to dry completely before applying the next. Double-check that your primer and paints are compatible. Finally, avoid rushing the process. Patience is key to achieving a professional-looking finish. Remember to work in a well-ventilated area and always wear appropriate safety gear.
Diecast car painting is an enjoyable and creative hobby that allows you to customize and personalize miniature vehicles. By following these guidelines, you can master the techniques and avoid common pitfalls, resulting in stunning models you can be proud of. Enjoy the process, experiment with different techniques, and let your creativity shine. With practice and patience, you’ll be creating beautiful diecast car models in no time. Remember, the key to success is to take your time, pay attention to detail, and have fun.