5 Top Tips to Paint Diecast Models
Painting diecast models can be a rewarding hobby, transforming a plain metal cast into a stunning replica. However, achieving professional-looking results requires more than just slapping on some paint. This guide will provide you with top five tips to help you master the art of painting diecast models, whether you’re a beginner or looking to refine your techniques. Following these steps will significantly improve the final appearance of your models. From preparation to finishing touches, we’ll cover everything you need to know to bring your miniature vehicles to life and enhance your hobby. The goal is to provide you with practical, actionable advice to make your model painting journey both enjoyable and successful, transforming your collection one model at a time.
Prepare Your Diecast Model for Painting
Preparation is key when painting diecast models. Before you even think about touching a brush, your model needs meticulous preparation. This involves several crucial steps to ensure the paint adheres properly and the final result is smooth and professional-looking. A well-prepared model is the foundation of a beautiful finish, so don’t rush this phase. Take your time and be thorough. The better the preparation, the better the outcome. This initial stage determines how well your paint will stick, how evenly it will apply, and ultimately, the overall appearance of your finished model. Skipping steps here can lead to peeling, bubbling, or a generally unattractive finish, so take the time to get it right.
Cleaning the Model

Start by cleaning your diecast model thoroughly. Use warm, soapy water and a soft brush to remove any dirt, dust, or oils. Rinse the model well and allow it to dry completely. These contaminants will interfere with paint adhesion. Ensure the model is completely dry before moving to the next step. It’s important to use a mild soap. Harsh chemicals could damage the model’s surface. Consider using a degreasing agent if the model has any oily residue, which is common on older models or ones that have been handled frequently. Once dry, inspect the model under good lighting to ensure no residue remains, as even small particles can affect the paint job. See image: diecast-model-cleaned.webp
Disassembly and Masking
If possible, disassemble the model to paint individual parts separately. This allows for a cleaner finish and easier access to intricate details. If disassembly isn’t possible, carefully mask off areas that you don’t want to paint, such as windows, chrome trim, and tires. Use high-quality masking tape designed for model painting, as it provides a clean edge and prevents paint bleed. Precise masking will make a big difference in the final look of your model. Make sure the tape adheres firmly to prevent paint from seeping underneath. Spend extra time on complex curves and edges. Careful masking will enhance the professional look of your finished model. See image: diecast-model-disassembled.webp
Choosing the Right Paints
Selecting the right type of paint is crucial for achieving a durable and aesthetically pleasing finish on your diecast models. The market offers a wide array of options, each with its own set of benefits and drawbacks. The choice of paint affects not only the appearance of the model but also the ease of application, drying time, and overall durability. Understanding the different paint types and their characteristics is essential for making an informed decision. Factors such as the surface finish, desired level of detail, and your personal preferences will all influence your choice. Let’s delve into the most popular paint options for diecast models.
Types of Paints to Use

The most common types of paints used for diecast models are acrylic and enamel. Each has its advantages and disadvantages, depending on the desired result and your painting style. Considering the environment where you’ll be working is also important, such as ventilation. Both types of paint offer a wide range of colors and finishes, allowing you to personalize your models. Your decision should be based on several factors, including ease of use, the level of detail required, and the desired finish. The goal is to select a paint that provides the best outcome based on your specific project needs.
Acrylic Paints
Acrylic paints are water-based, making them easy to clean up and less toxic than enamel paints. They dry quickly, allowing you to apply multiple coats in a short amount of time. Acrylics are available in a wide range of colors and finishes, including matte, satin, and gloss. They are also compatible with various weathering techniques. However, acrylics can be less durable than enamels and may require a primer for better adhesion. They are generally a great choice for beginners due to their ease of use and lower toxicity levels. Acrylics also allow for a high degree of detail work and can be thinned to achieve smooth, even coats. See image: acrylic-paint-diecast.webp
Enamel Paints
Enamel paints are oil-based and known for their durability and high-gloss finish. They offer excellent coverage and are resistant to chipping and scratching. Enamels require a longer drying time and the use of paint thinners for cleanup. Because of their slower drying, enamels can be more forgiving when blending and correcting mistakes. Enamels are also known for their self-leveling properties, which can result in a smoother finish. However, the longer drying time can be a drawback, and the use of solvents requires good ventilation. See image: enamel-paint-diecast.webp
Applying the Paint

How you apply the paint is as crucial as the type of paint you choose. Proper application ensures a smooth, even finish and enhances the overall appearance of your model. Whether you use an airbrush or a traditional brush, technique matters. Consistent strokes, the correct distance from the model, and applying multiple thin coats are key to success. Taking your time and paying attention to detail will dramatically improve the final result. Always work in a well-ventilated area and follow the manufacturer’s instructions on the paint. The goal is to create a uniform, durable coating that brings your model to life.
Priming the Model
Priming is a vital step in the painting process. A primer provides a uniform base for the paint to adhere to, improves adhesion, and helps to highlight any imperfections. It’s also especially important when painting diecast models. Choose a primer that is compatible with the type of paint you are using. Apply the primer in thin, even coats, and allow it to dry completely before proceeding. This will enhance the durability of the final paint job and helps to ensure the paint doesn’t chip or flake. Priming is particularly critical when using acrylic paints, as they don’t always adhere well to metal surfaces without a primer. See image: priming-diecast-model.webp
Applying Base Coats
Apply the base coat in thin, even layers. Avoid applying thick coats, as they can lead to runs, drips, and a less-than-smooth finish. The goal is to build up the color gradually, allowing each coat to dry before applying the next. Multiple thin coats will give you a much smoother, more durable finish than one thick coat. If using an airbrush, maintain a consistent distance from the model and move the airbrush evenly across the surface. For brush application, use a high-quality brush and apply the paint in smooth, even strokes. Let each coat dry completely before applying the next. Patience is key to achieving a professional look.
Adding Details and Finishes

Once the base coat is dry, you can add details and finishes to enhance the realism of your model. This might include painting interior details, applying decals, or adding chrome accents. This is where your model truly starts to come to life. Use fine-tipped brushes or specialized detailing tools to add precision to the finer elements of the model. If you are adding decals, ensure the surface is smooth and clean before applying. Apply a clear coat or varnish to protect the paint job and decals. Carefully consider all the details before committing, so they look polished and enhance the model’s overall appearance. See image: detailing-diecast-model.webp
Weathering Techniques
Weathering techniques can add realism to your diecast models by simulating wear, tear, and environmental effects. This can include using washes, dry brushing, and pigments to create effects like rust, dirt, and fading. These techniques can add a sense of depth and realism to your models. Start by experimenting on a scrap piece before applying weathering effects to your model. Less is often more when it comes to weathering. Remember to build the weathering effects gradually, layering different techniques to achieve the desired look. This adds a level of detail that makes your model more visually interesting and realistic. Consider reference photos of real vehicles for inspiration to create a more authentic feel.
Reassembly and Final Touches
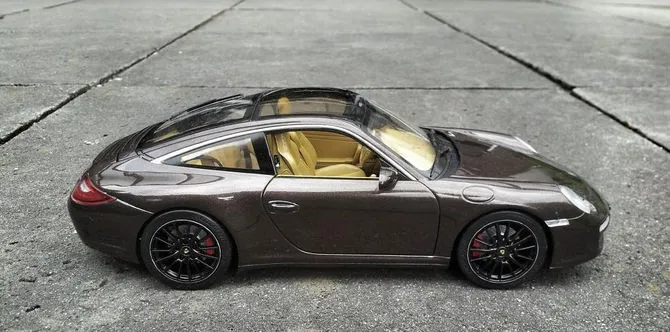
Once the paint and details are completely dry, carefully reassemble the model. Inspect your work carefully and make any necessary touch-ups. Apply a clear coat to protect the paint job and decals, if desired. The final step is to step back and admire your work. You’ve transformed a bare metal diecast model into a detailed replica. Carefully inspect your work under good lighting to ensure there are no imperfections. This is the culmination of your hard work and attention to detail. Ensure all parts fit together properly during reassembly. Reassembling the model carefully ensures that all parts align correctly, and no paint is chipped or damaged. See image: reassembled-diecast-model.webp
Conclusion

Painting diecast models is a rewarding hobby that allows you to express your creativity and attention to detail. By following the tips outlined in this guide, you can significantly improve your painting results. Remember to take your time, prepare your model thoroughly, choose the right paints, and apply them with care. With practice and patience, you can transform your diecast models into stunning, realistic replicas that you can be proud of. Enjoy the process of bringing these miniature vehicles to life, and continue to refine your techniques. The more you paint, the better you will become. Happy modeling!